Publish and share Power BI reports (Desktop to Service)
Learn how to publish a Power BI report from Desktop to Service, share a link with teammates, understand workspace basics, and choose the right viewer vs contributor setup.
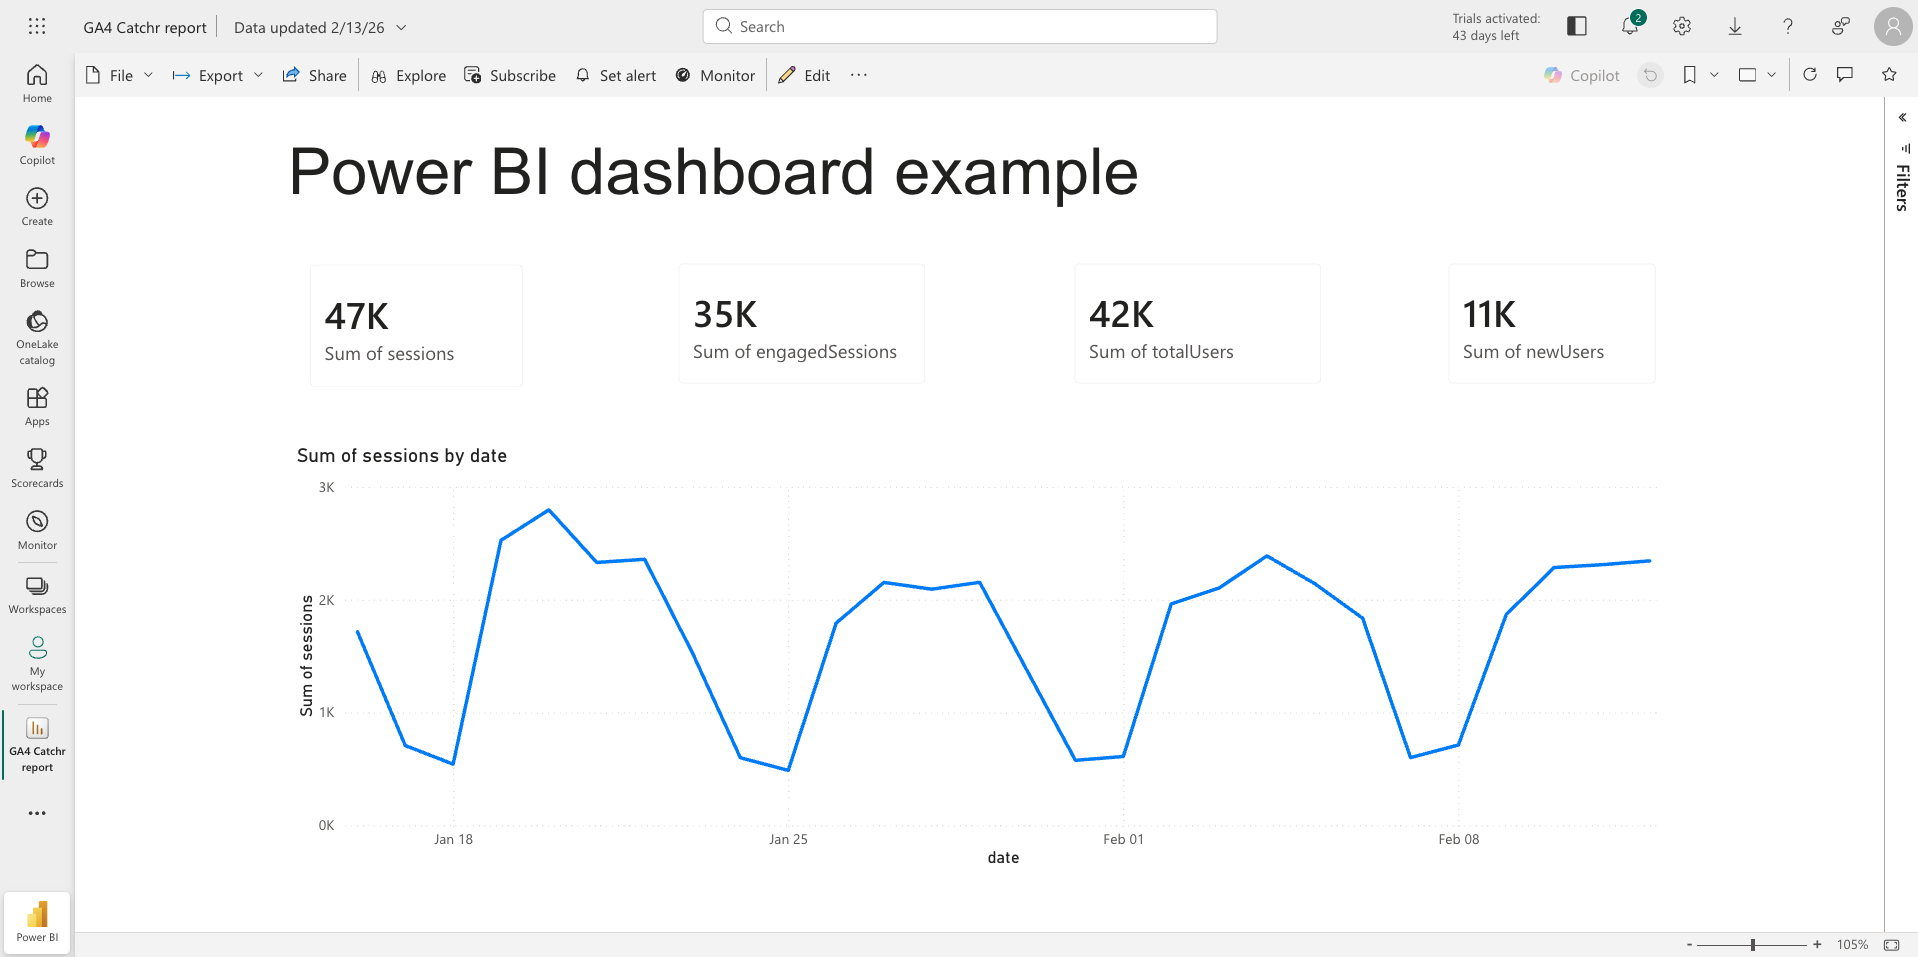
Publishing is the moment your Power BI work becomes usable by the rest of the marketing team. You move from a PBIX on your laptop to a shared report in Power BI Service, where people can view, comment, and collaborate.

Publish from Power BI Desktop to Power BI Service
Before you publish: make sure the report has a clear landing page, consistent slicers, and titles that explain context.
Publish step by step
- Open the PBIX in Power BI Desktop.
- Select Publish.
- Choose the destination workspace in Power BI Service.
- Confirm and wait for the publish to complete.

After publishing, open the report in Power BI Service and review it end to end. Some layout issues can appear differently in Service than in Desktop, especially on smaller screens.
Publishing from Power BI Desktop to Power BI Service isn’t available on the Free plan. You’ll need a Power BI subscription to publish.
Power BI Services: Share with teammates
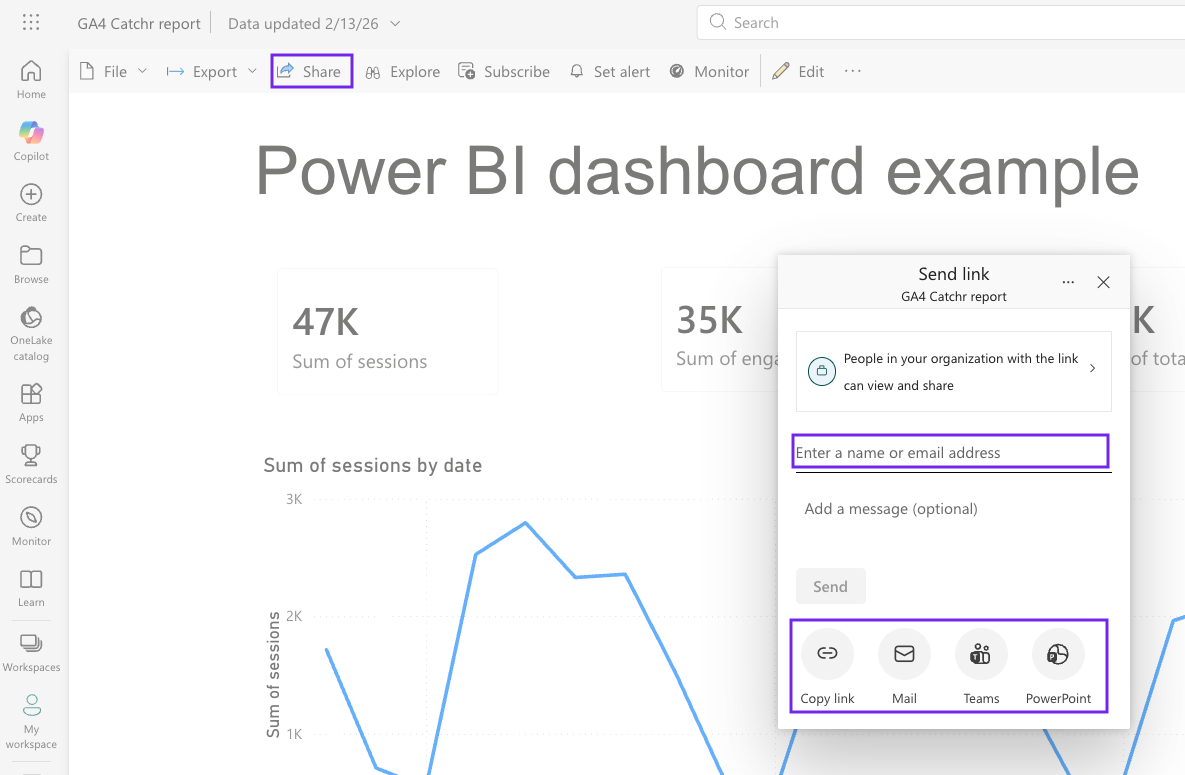
Share a report link
Sharing a report is the common option when you want teammates to view and interact with slicers. It works well for executives and channel owners who should not edit the content.
- Open the report in Power BI Service.
- Select Share (top-right).
- Enter teammates’ emails (or copy a link, depending on your tenant settings).
- Choose permissions (view-only by default; avoid allowing edit unless needed).
- Select Send (or Copy link).
Add people to a workspace
Workspaces are best when multiple people build, maintain, or QA reports. This is also where you control permissions and roles like Viewer and Contributor.
A simple workflow is to keep builders in the workspace, then share the finished report to a wider audience.
Workspace basics
A workspace is a container for reports, semantic models (datasets), dashboards, and related content. For marketing teams, workspaces help you separate “draft work” from “trusted reporting”.
Common patterns:
- One workspace per business area, such as Growth, CRM, or Web.
- One workspace per lifecycle stage, such as Development and Production, if you want stronger governance.
Viewer vs contributor mindset
Viewer mindset
A viewer should explore, filter, and export what they are allowed to export. They should not be able to change measures, change relationships, or publish updates.
Contributor mindset
A contributor is responsible for keeping definitions consistent. That includes KPI logic, date handling, and segment rules like “exclude test campaigns”. It also includes keeping the report understandable for a non-technical stakeholder.
If you work with multiple marketing platforms, reliable refresh becomes part of the contributor mindset. Scheduled refresh runs in Power BI Service, and teams often use connector layers to reduce manual exports.
Conclusion
Publishing is not just an upload step. It is how you turn a dashboard into a shared operating tool. Use workspaces to separate viewers from contributors, and treat Power BI Service as the place where reporting becomes reliable, shareable, and repeatable.

.svg)