blog post

Connect Google Ads to Looker Studio : How-to, templates and metrics...

Johan Chemin
September 11, 2024
Connect Google Ads to Looker Studio : How-to, templates and metrics...

Quick steps to create a Google Ads report with Google Sheets:

You can easiliy create a Google Ads report following this step :

  1. Get informations from the data integration from our Google Ads connector.
  2. Create a source on catchr.io.
  3. Download our Google Sheets extensions.
  4. Configure and run your request
If you need more informations, you can follow the tutorial.

How to install Google Sheets Catchr Add-on.

To start exporting your Google Ads data to Google Sheets, you need to install the Catchr add-on. You currently have two options :

Option A: Via the marketplace:

  1. Visit the Catchr Add-on page on the Google Workspace Marketplace and click "Install."
  2. Grant the necessary permissions for the add-on.
  3. Upon successful installation, open a Google Sheets to proceed.
Connect Google Sheet to Facebook Ads
Install Catchr Google Sheets Add-on

Option B: Directly within a Google Sheets:

  1. Open a new Google Sheets.
  2. In the top menu, click "Extensions", then hover over "Add-ons" and select "Get add-ons."
  3. Search for "Catchr" and choose "Catchr - data connector."
  4. Click "Install" and grant the required permissions.
  5. Close the installation pop-up when completed.
  6. Start using the Catchr add-on.
Install Catchr Add-on for Google Sheets

Once you have installed the add-on, you can start making requests.

The tutorial

Quick steps to create a Google Ads report with Looker Studio:

You can easiliy create a Google Ads report following this step :

  1. Get informations from the data integration from our Google Ads connector.
  2. Create a datasource and new report on Looker Studio.
  3. Choose your metrics and dimensions.
  4. Use charts with your metrics and dimensions.
If you need more informations, you can follow the tutorial. You can also find a template for Google Ads at the end of the page.

The tutorial

Quick steps to create a Google Ads report with PowerBI:

You can easiliy create a Google Ads report following this step :

  1. Get informations from the data integration from our Google Ads connector.
  2. Create a source on catchr.io.
  3. Configure your request on the PowerBI request manager.
  4. Copy the given URL in PowerBI
If you need more informations, you can follow the tutorial. You can also find a template for Google Ads at the end of the page.

The tutorial

Welcome to your guide on integrating Google Ads data into Looker Studio (formerly Google Data Studio). Upon completing this tutorial, you will have mastered the essential steps to visualize and analyze your Google Ads marketing data using Looker Studio's dynamic dashboards.

How to connect your Google Ads account to Looker Studio

Create an Account on Looker Studio

If you're new to Looker Studio, the first step is to set up an account. Simply use your existing Google account to sign in and get started.

Signing into Looker Studio

Connect Google Ads to Looker Studio

Let's begin the process of syncing your Google Ads data with Looker Studio.

  • From your Looker Studio homepage, start by clicking on the "Create" button.
Looker Studio dashboard with 'Create' button highlighted
  • Select the "Report" option to proceed.
Option to select 'Report' in Looker Studio
  • Within the data sources gallery, use the search function to find the Catchr Google Ads data connector.
Searching for Catchr Google Ads data connector

Step-by-step guide on the authorization step:

If it's your first time connecting to this connector, you’ll need to grant the necessary permissions.

  • Authorize Looker Studio by clicking on the first 'Authorize' button, which enables the community connector usage.
Authorize button for Looker Studio community connector
  • Select the Google Account you wish to associate with Looker Studio.
Google Account selection
  • Review the necessary authorization details for Looker Studio, then scroll to the bottom.
Authorization information for Looker Studio
  • Click "Allow" to grant Looker Studio access to your Google Ads data.
Allow access button

Next, you'll integrate Catchr with your Google Ads:

  • Click on the second 'Authorize' button to permit the Looker Studio connector to access your Catchr Google Ads data.
Authorize button for Catchr Google Ads data
  • Follow the on-screen instructions in the popup to authorize Catchr's connection to your Google Ads account. Once completed, a confirmation popup will appear.
Catchr authorization process completion
  • After a brief loading period, you will be directed back to the connector page. Here, you should select the appropriate account from Catchr that you wish to add and click on "Add".
Adding account to connector
  • If the "Add" button isn't visible at the bottom right, check the top right for a button labeled "Create Report" or simply "Report".
Alternate locations for 'Add' or 'Create Report' button

You've successfully connected your Google Ads account to Looker Studio!

Exploring Metrics and Creating Visualizations for Google Ads

With Catchr's integration to Looker Studio, you now have access to a wide range of metrics from your Google Ads account. For an in-depth look at the available metrics, explore the detailed listing provided by Catchr here.

Imagine visualizing the percentage of ad impressions ranking at the absolute top of searches with the "Impr. (Abs. Top) %" metric or analyzing demographic insights with "Age" and "Gender" metrics. The opportunities are endless, whether you're gauging the performance of keywords, scrutinizing the average cost for viewable impressions, or understanding user interactions across networks.

Take, for example, the "Active View avg. CPM" measure; you can interpret the average cost of your visible advertisements and better optimize your spend efficiency. Or perhaps the "All conv. rate," a crucial KPI indicating click-to-conversion success rate, which is pivotal in measuring campaign effectiveness.

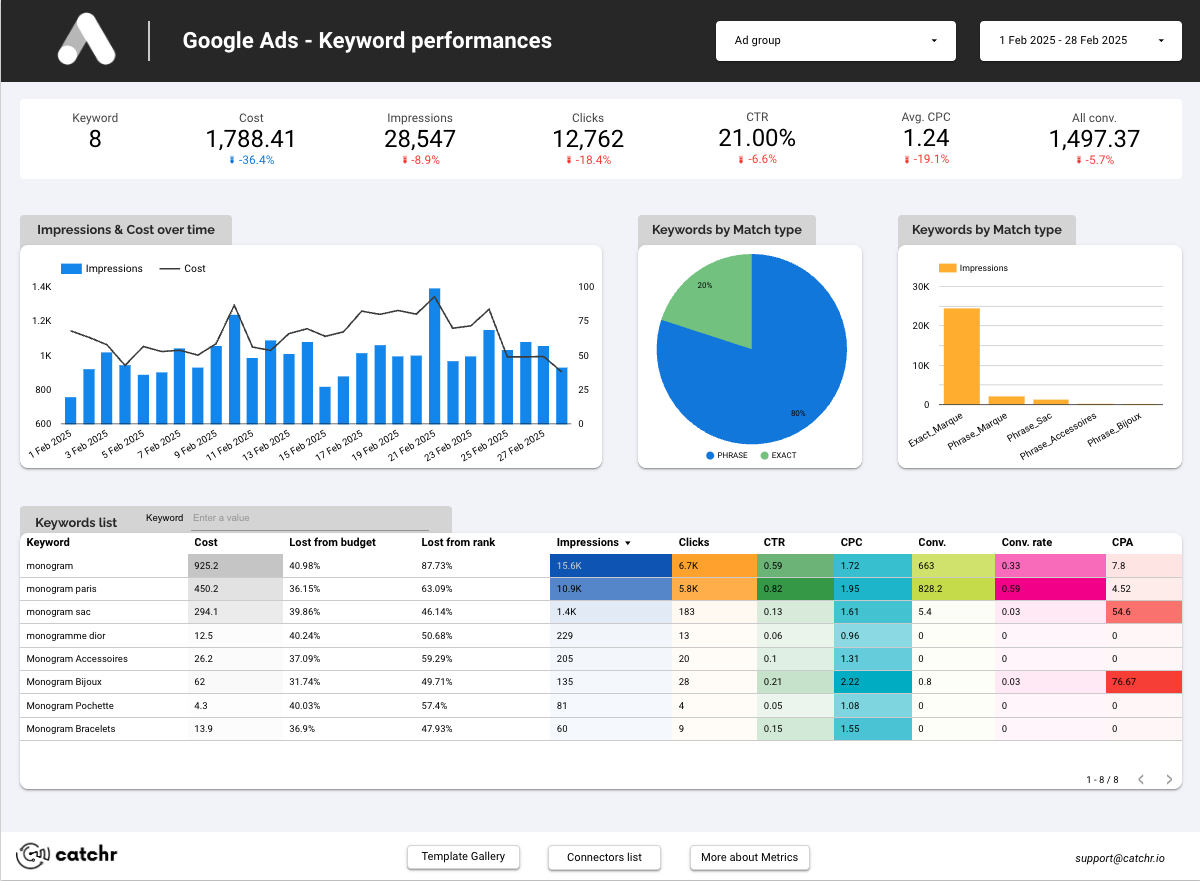
Using Looker Studio's varied chart types, from time series to bar graphs, you can bring these metrics to life. Customize and correlate data based on particular campaigns, ad groups, or specific keywords. Track trends, compare performance metrics over time, and generate actionable insights to optimize your marketing strategies.

The compatibility of Google Ads with Looker Studio offers you a reliable and insightful means to steer your campaigns towards desirable outcomes.

Create your Google Ads report on Looker Studio:

From your data source page, click on Create Report at the top right.

You created a report with your data source attached. You can find the data source fields list in the far right panel. 

This is your canvas. It's here that you will place charts and create your dashboard! You can have a detailed explanation of this interface in this article.

The first thing to do is to choose which KPIs we want to use:

  • Cost -> How much do I spend on Google Ads?
  • Impression -> How many times one of my ads were seen?
  • Cost per Mille impressions (CPM)-> How much did 1000 impressions cost me?
  • Reach -> How many people saw at least one ad?
  • Clicks -> How many clicks were made on one of my ads?
  • Cost per Click (CPC) -> How much does a single click cost me?
  • Click Through Rate (CTR) -> Percent of people who saw and clicked on an ad.
  • Total Conversions -> How many people made a conversion action during their visit to my website?
  • Total Conversion Value -> How much revenue the conversions generate.
  • Conversion Rate (CVR) -> Percent of people that click on an ad and do a conversion action.
  • Return on Ads Spend (ROAS) -> How many times do my ads return my investments?

And we will breakdown with some dimensions: 

  • Campaign -> To have the performance by campaigns.
  • Ad group -> To have the performance by ad groups.
  • Country -> To check where my ads are seen, clicks, and create a conversion.
  • Age and Gender -> To better know my audience.

Now we can start creating our report.

{{cta-template-looker-source}}

Add a Scorecard:

We can start adding elements to the report. We'll begin by displaying a Scorecard for each chosen metric:

  • Click on Add a chart, then Scorecard.
  • Add it to the canvas.
  • Modify the setting: under metric, choose Impressions.
Add a scorecard to display a global metric.
  • You can add the comparison to the previous period like this :
Add the comparison to the previous period to a Looker Studio chart.

Copy and paste this Scorecard and repeat the operation for each metric.

Once every Scorecard is displayed, align them all:

  • Select all the Scorecards.
  • Right-click on it, then Distribute -> Horizontally.
  • Right-Click on it, then Align Vertically -> Top.
Distribut and aligne your scorecard

Add a table:

We will create two tables to display our performance by Campaign and AdGroup:

  • Click on Add a Chart, then Table.
  • Place it on the canvas.
  • Change the dimension to the Campaign name.
  • Add the metrics you want to break down by Campaign.
Add and configure a table

Once all the metrics are added, copy and paste this table and change the dimension to the Ad group name.

Add a GeoChart:

Adding a map to our report is a great way to visualize the repartition of your ads performance :

  • Click on Add a chart.
  • Select the Geo chart and place it in the canvas.
Add a Geo Chart in a Looker Studio report.
  • Change the dimensions to Country.
  • Change the metrics to Conversion.
Change dimension and metrics for your GEO Chart

Geo Charts can only display one metric at a time, but you can use the Optional metrics option to quickly change metrics in view mode.

Change dimension and metrics for your GEO Chart

Use optional metrics in your Geo Chart

Add bar chart:

For the Gender and Age breakdown, we will use a bar chart. It's a great way to analyze your audiences quickly:

  • Click on Add a chart, then Bar.
  • Add it to the canvas.
Add a bar chart to your Looker Studio report.
  • In dimension, select Gender.
  • In metrics, select the one you want breakdown by Gender.
  • Repeat this operation for the Age.
Configure dimension and metric for your bar chart.

For example, you can explore the style options to modify your bar chart to display horizontally.

Modify your chart to horizontal display
Modify your chart to horizontal display.

Add control fields:

To finish the data part of this report, we need to add some control fields. Control fields will allow viewers to modify the selected date range and apply filters on dimensions like the Campaign Name, etc.

  • Click Add a control.
  • Select Date Range Control and place it on your canvas.
Add a date selector to your Looker Studio report.

  • You can select a default time range in the settings column.
Change the default configuration of your data time selector.

Now we will add a dropdown list to select only the wanted campaign. Once active, all the pages will automatically adapt to match the filter.

  • Click on Add a control.
  • Select the Dropdown list and add it to the canvas.
  • Under dimension, choose the Campaign name.

Try to click on it to check how it works! And explore the other control fields. For example, you can find filters via text, fixed size select box, etc.

Style your Looker Studio report:

Color and size

Now that everything is displayed, we can modify the style of this report.

First things, you might feel that this report is too small:

  • Go to Theme and Style, then Layout.
  • Under Canvas Size, adapt the height and width as you, please. 
Change the canva size in Looker Studio
Change the canvas size in Looker Studio

Then go back to Theme. Here you can choose a pre-made theme to change the color of your report's components quickly.

Title and text:

You can use a text box easily to add some titles and informative text about your performance:

  • Click on the Text shortcut and place it on the canvas.
  • Modify the text.
Add a text box to your report.
Add a text box to your report

Explore the Style options. You can change the font color and size, add borders and shadows, and create the perfect text box for every situation.

Add an image:

You can add some images to your report. For example, try to add your logo or your client's logo.

Add an image to your report.

How to share your report?

You are the owner of this report now. You can share it easily with the Share button at the top right and manage which role everyone has:

  • Viewer: this person can only view the report and interact with the dynamic filter and editor left in the report.
  • Editor: This person can edit your report, create new pages, add charts, and modify the style.

You'll find a detailed article on how to share your report here.

A great template and how to copy it:

To save some time, you can use a template report. You can copy it with one of your data sources and have an already-styled report where you only need to adapt the KPIs.

Here is a template based on this tutorial. You'll find everything we saw in this article. And follow this link to a tutorial to copy it easily.

Quickstep to create a Google Ads Looker Studio report.

  • Login to Looker Studio.
  • Create a new data source using a Google Ads connector.
  • Click Create Report when you finish creating your Google Ads data source.
  • Click on Add a chart and place a chart on the canvas. Modify the dimensions and metrics to match your KPIs.
  • Use the Theme and Layout menu to use a personalized theme quickly.

Empower your Marketing data analysis
Discover +50 connectors to import your Marketing data into your favorite dashboard tool! Unlock instant data integration with Catchr's no-code feature – no IT team required!
Start your free trial!

All your marketing data on Looker Studio

Build Looker Studio dashboard with your different marketing data and track all the essential KPIs.

Start your free trial!
Keep an eye on your data

Connect your Google Ads data to Google Sheets thanks to Catchr's no code connector!

Start your free trial!
Need a clearer view of your marketing data?
Unlock your free Looker Studio dashboard template for from a collection of +50 stunning designs. Elevate your data visualization!
Get it for free
Need a clearer view of your marketing data?
Unlock your free Power BI dashboard template from a collection of stunning designs. Elevate your data visualization!
Get it for free
Need a clearer view of your marketing data?

Unlock your free Google Ads Overview dashboard template for Power BI from a collection of stunning designs. Elevate your data visualization!

Get it for free
Need a clearer view of your marketing data?

Unlock your free Template Google Ads Overview V2 dashboard template for Looker Studio from a collection of +50 stunning designs. Elevate your data visualization!

Get it for free

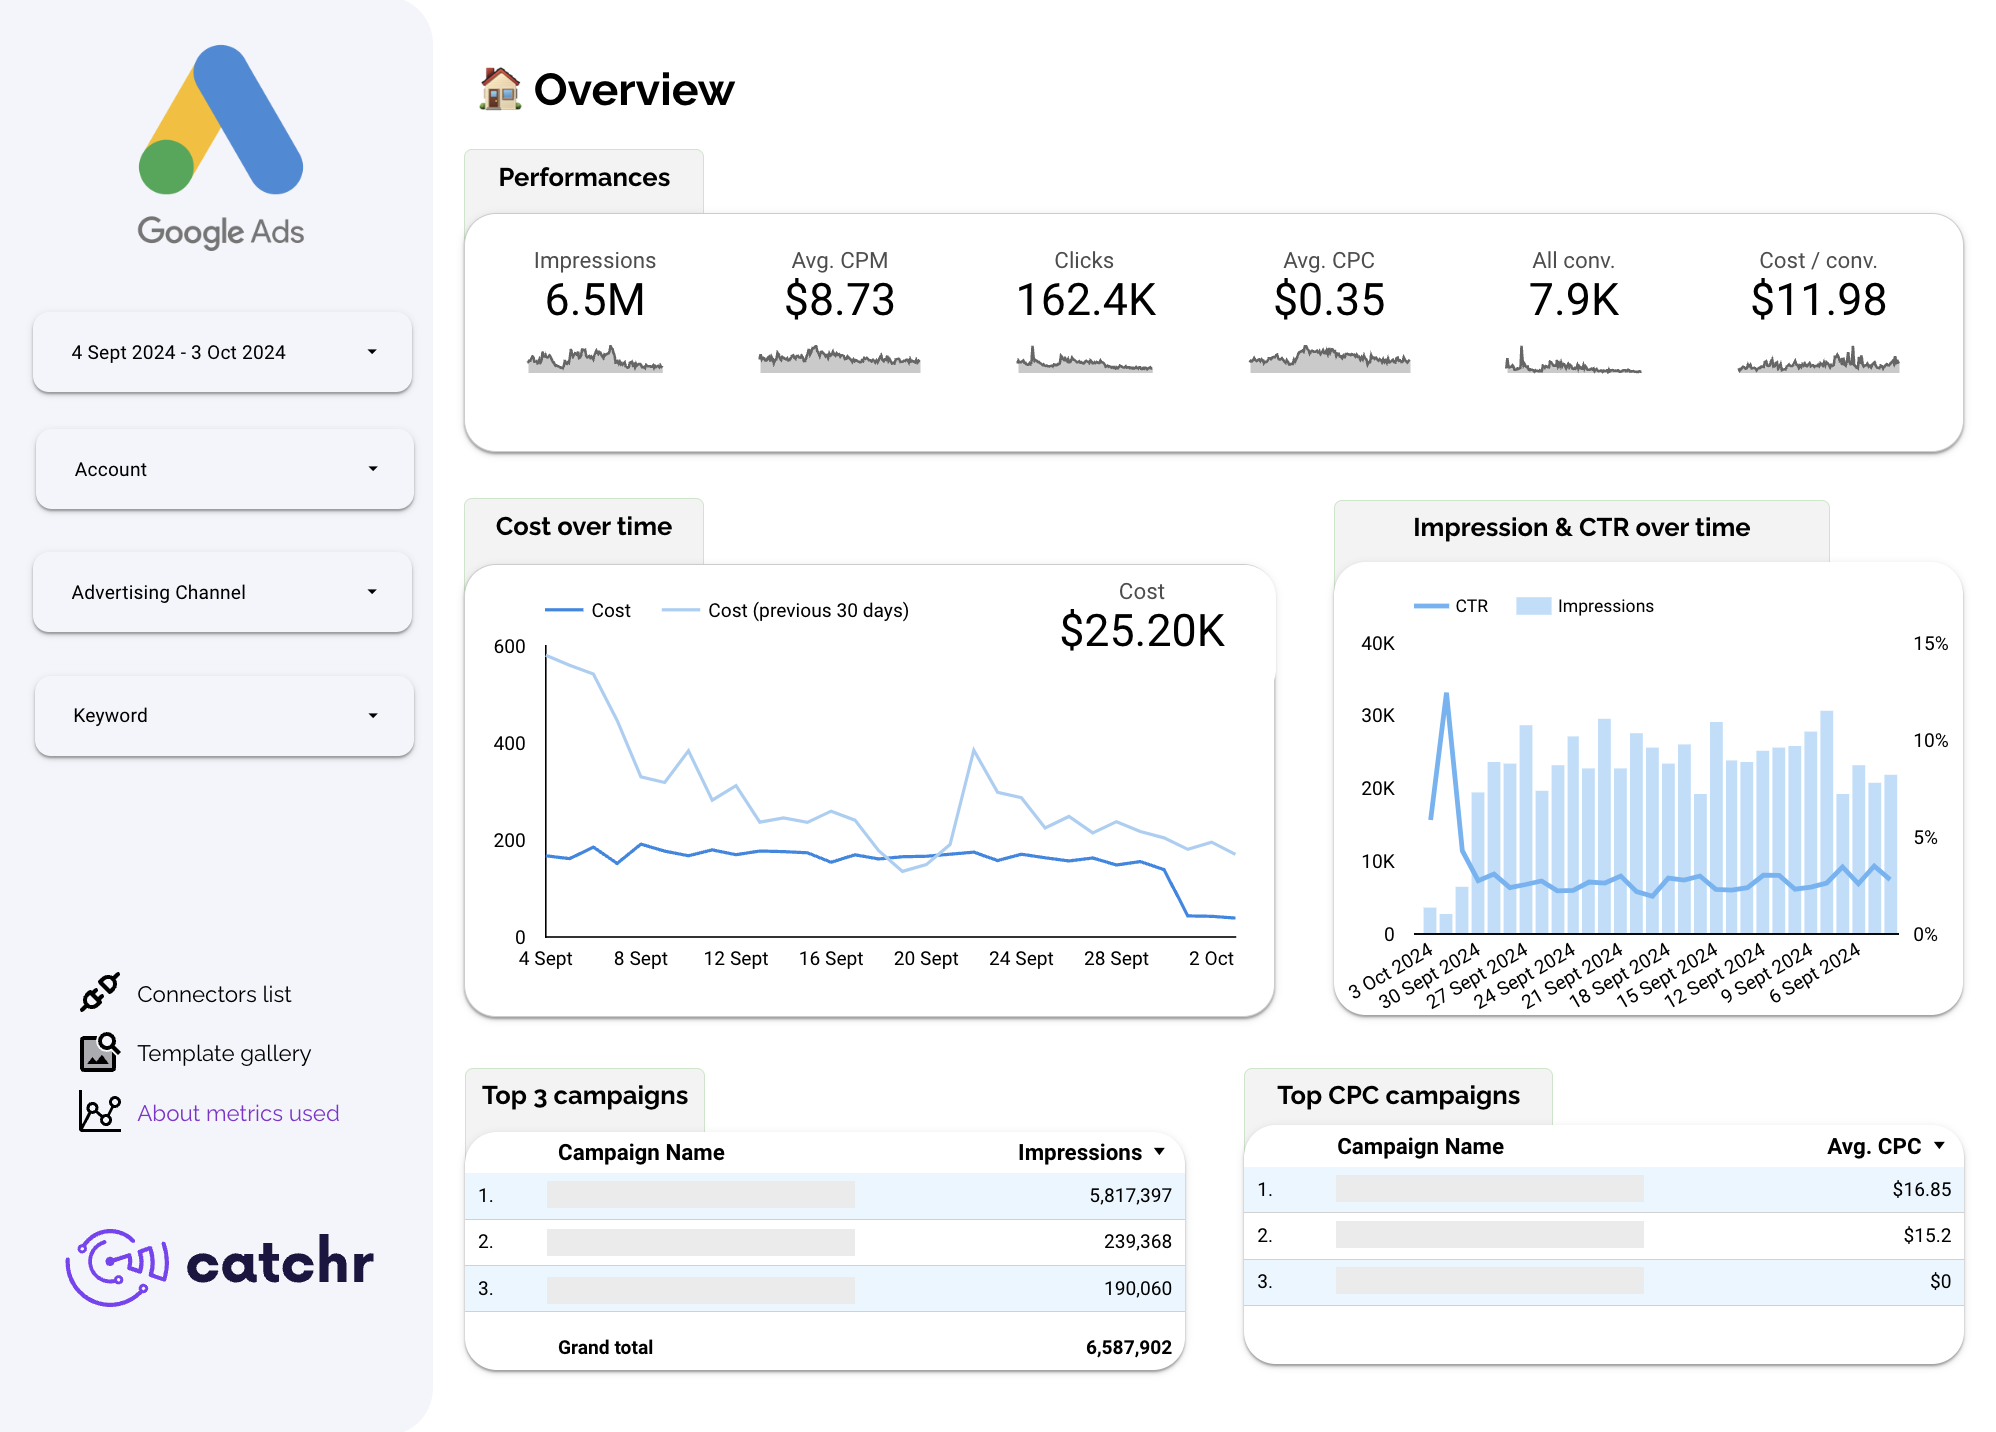
Bonus : Your free Template Google Ads Overview V2 Template

In this Google Ads template, you will find all the metrics and dimensions you would need to get a better view of your data.

If you need more templates, you could look at our looker studio template gallery.

Bonus : Your free Google Ads Overview Template for PowerBI

In this Google Ads template, you will find all the metrics and dimensions you would need to get a better view of your data thank to our integrations.

If you need more templates, you could look at our PowerBI template gallery.

Unlock Insights with Style!

Transform your marketing data into stunning dashboards.

Integrate, visualize, and impress with Catchr's seamless dashboards. Elevate your data game now!
Build your first report
14 days free-trial - No credit card required 🎉

More blog post about Google Ads