Blog post
Catchr
Looker Studio
Shopify
Looker Studio is a powerful free tool that helps you visualize and analyze your marketing and sales data. However, it has limited native connectors, and Shopify isn’t one of them. If you’re looking to connect your Shopify store data to Looker Studio, you’re in the right place.
In this guide, you’ll learn two methods to bring your e-commerce data into Looker Studio:
Connecting Shopify to Looker Studio gives you a complete, real-time view of your store performance. Instead of checking multiple reports in Shopify Analytics, Google Ads, or Meta Ads, you can centralize all your key metrics (revenue, orders, products, refunds, and customers) inside one interactive dashboard.
With Looker Studio, you can:
In short, connecting Shopify to Looker Studio transforms your raw store data into clear, actionable insights that help you scale faster and smarter.
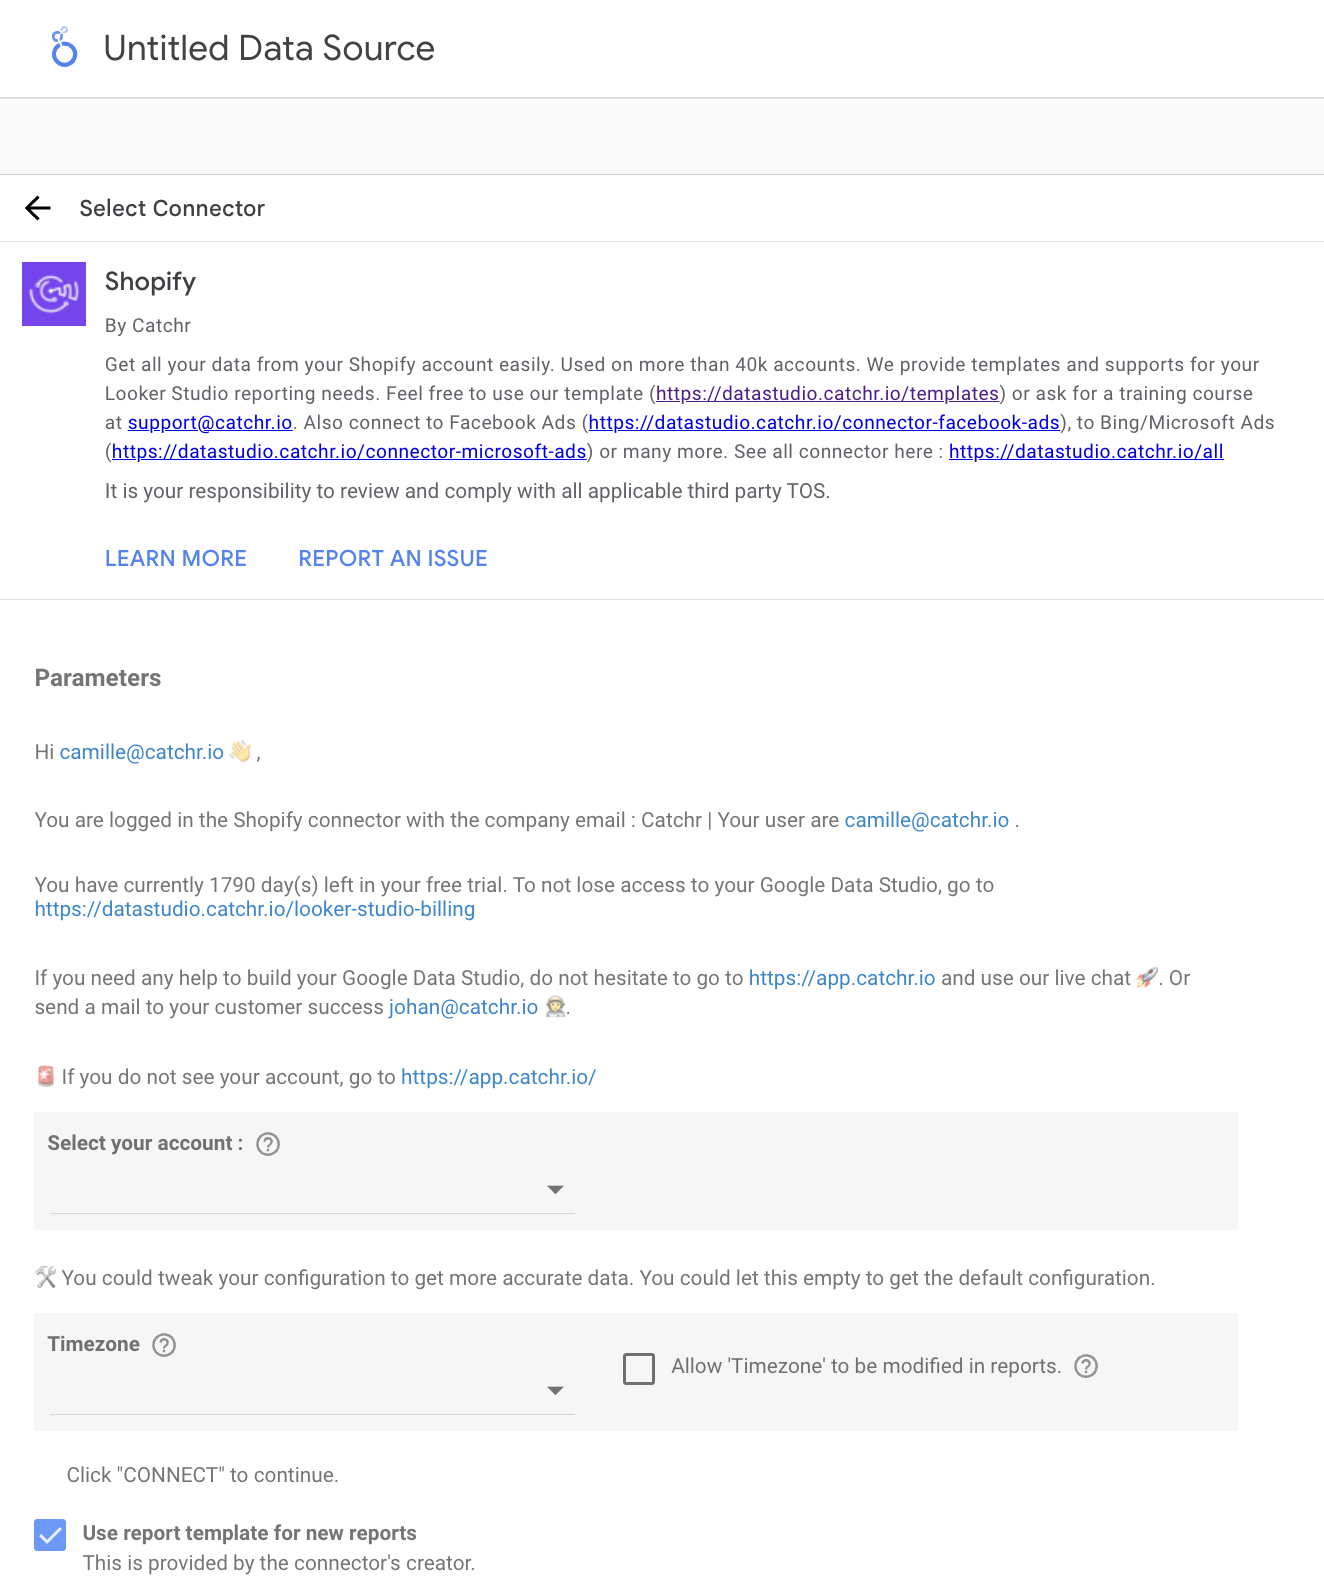
For most merchants and marketers, this is the recommended method. It uses Catchr’s certified connector to pull data directly from Shopify’s API into Looker Studio, with automatic daily refresh.
The Catchr connector acts as a bridge between Shopify and Looker Studio. Once connected, Catchr uses Shopify’s API to retrieve your orders, products, and customer data automatically.
Your dashboards update every day, so you can focus on analysis rather than manual exports.


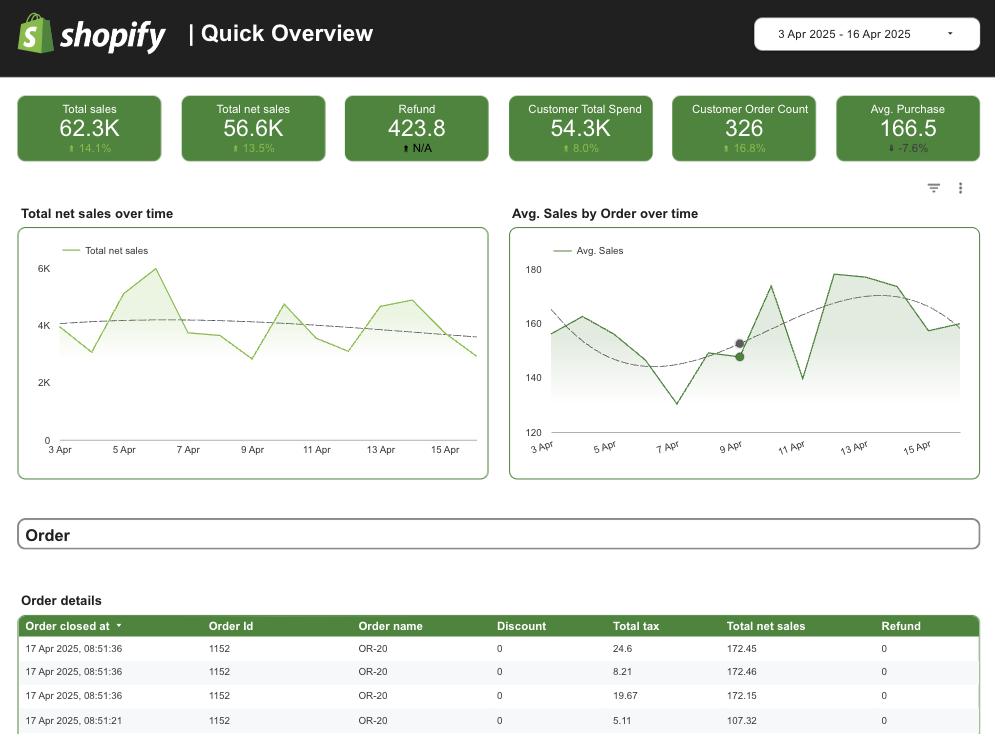
Connecting Shopify to Looker Studio helps you transform your store data into powerful dashboards for performance tracking, sales analysis, and growth monitoring.
To help you get started, Catchr provides ready-to-use Shopify Looker Studio templates.
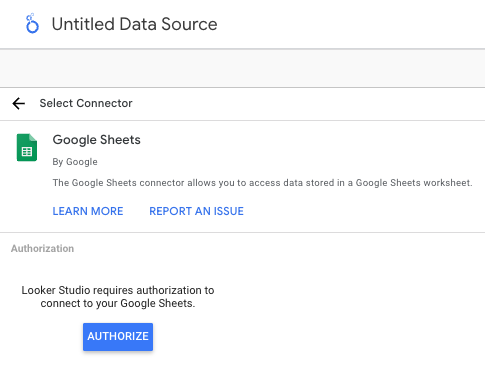
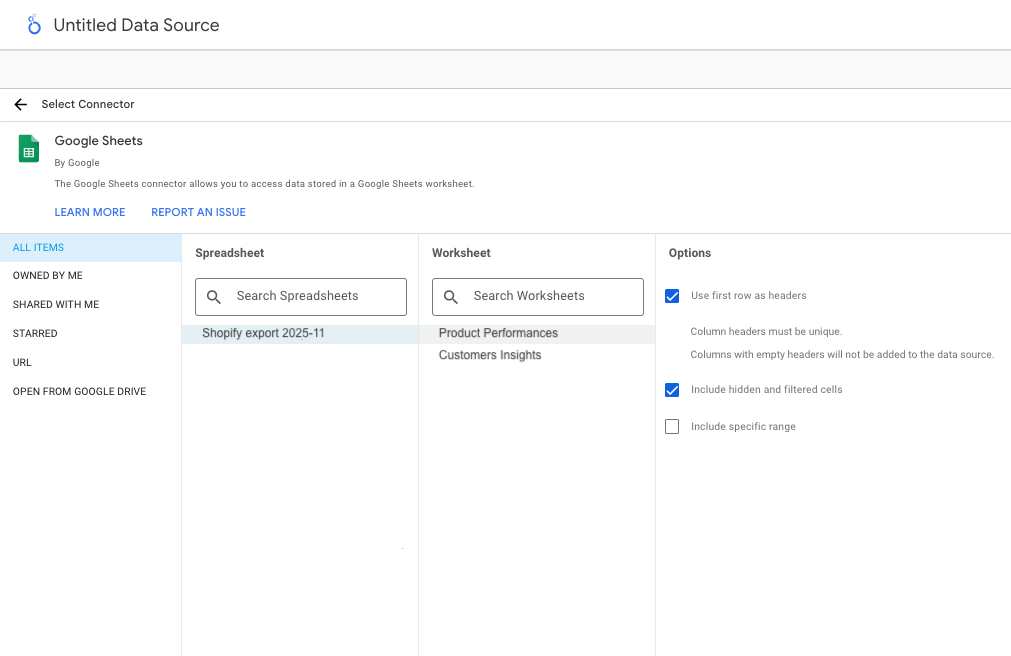
If you prefer a free, manual approach, you can use Google Sheets as an intermediary between Shopify and Looker Studio.
This method is simple but requires regular exports or an external automation tool (like Zapier or Make) to refresh data automatically.
You’ll export your Shopify orders or product data into Google Sheets using Shopify’s built-in export feature or a free plugin. Then, you’ll connect that spreadsheet to Looker Studio using the Google Sheets connector.

If you manage multiple stores or need real-time, always-updated dashboards, the Catchr connector is the clear choice. For smaller projects or quick analyses, Google Sheets works just fine.
Yes. Catchr supports multiple Shopify stores in one Looker Studio report.
Yes. Catchr refreshes your Shopify data daily. Google Sheets requires manual or automated imports.
Absolutely. You can combine Shopify with Google Ads, Meta Ads, or GA4 to build a full marketing and sales dashboard.
You can retrieve orders, revenue, refunds, customers, taxes, discounts, and product details through Catchr’s connector. You can find the full list of Shopify available fields.
Catchr offers a free trial, then a paid plan for continuous synchronization and advanced automation.
Connecting your Shopify data to Looker Studio helps you track sales, products, and marketing performance in one place. Whether you use the automated Catchr connector or the manual Google Sheets method, you’ll have full control over your store analytics.
Once connected, you can focus on insights and growth, instead of juggling exports and reports.

Start using Looker Studio with a ready-to-use template
Get the template
Start analyzing your data with a Looker Studio template
Catchr provides free dashboard templates to help you start analyzing your data on Looker Studio — 100+ available templates!
See all the Looker Studio templatesStart analyzing your data with a Power BI template
Catchr provides free dashboard templates to help you start analyzing your data on Power BI — 20+ available templates!
See all the Power BI templatesStart analyzing your data with a Power BI template
Catchr provides free dashboard templates to help you start analyzing your data on Power BI — 20+ available templates!
See all the Power BI templatesStart analyzing your data with a Google Sheets template
Catchr provides free dashboard templates to help you start analyzing your data on Google Sheets — 20+ available templates!
See all the Google Sheets templatesStart analyzing your data with a Google Sheets template
Catchr provides free dashboard templates to help you start analyzing your data on Google Sheets — 20+ available templates!
See all the Google Sheets templates✔ 14 days free trial — No credit-card required
✔ 14 days free trial — No credit-card required
Move your Marketing data to your favorite tools
Simplify your data extraction and move all your Marketing data to dashboard tools, spreadsheets, database and more... No code required!
75+ connectors | 20+ destinations
✔ 14 days free trial — No credit-card required


